Homemade Peanut Butter Cups Dark Chocolate
Highlighted under: Dessert Bliss
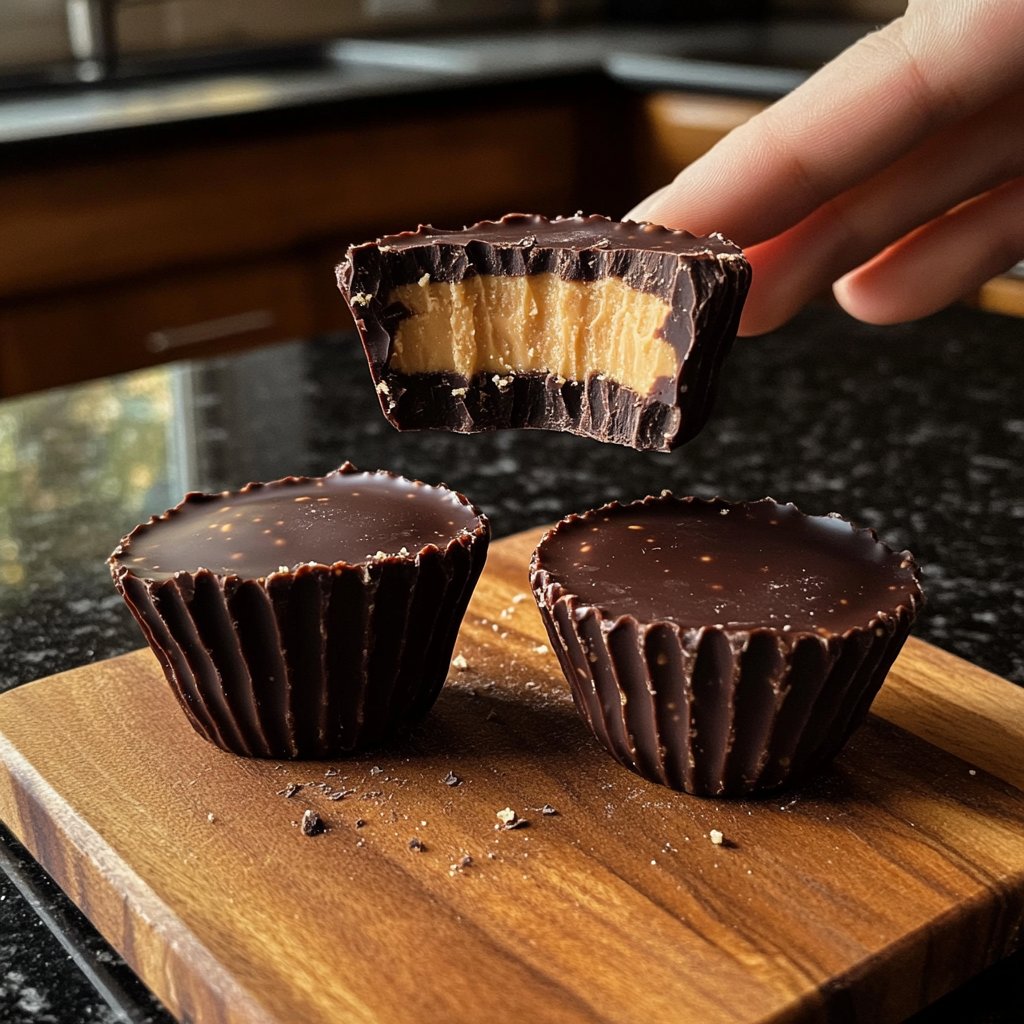
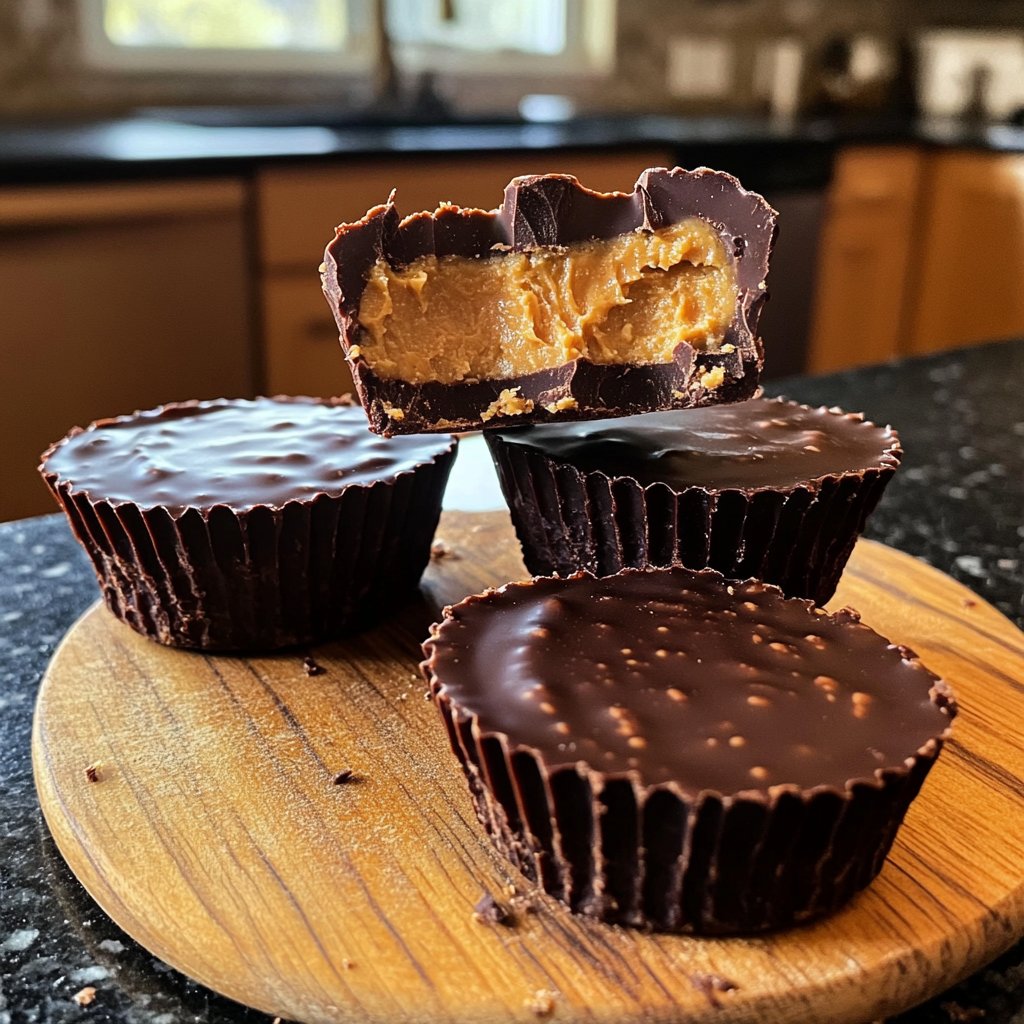
I absolutely love making my own peanut butter cups at home! It’s a delightful process that lets me control the ingredients and create a version that suits my taste perfectly. The rich dark chocolate beautifully encases the creamy peanut butter filling, and every bite is simply heavenly. Not only do I get to enjoy a delicious treat, but I also find joy in sharing them with friends and family. Trust me, once you try this recipe, you’ll never want to go back to store-bought versions again!
When I first decided to make homemade peanut butter cups, I thought it would be a simple and quick endeavor. I was pleasantly surprised by how fun and rewarding the process turned out to be. The key is to temper the dark chocolate, which helps achieve a glossy finish and the perfect snap. This attention to detail elevates the overall taste and presentation, making them look as good as they taste.
One specific tip I learned along the way is to let the melted chocolate cool slightly before pouring it into the molds. This prevents the chocolate from becoming too hot, which could potentially melt the peanut butter filling if they mix. Patience pays off in creating these indulgent treats, and I promise it's worth every minute!
Why You'll Love This Recipe
- Decadent dark chocolate that satisfies any sweet tooth
- Creamy, homemade peanut butter filling for a gourmet touch
- Healthier alternative to store-bought candies, with better ingredients
Key Techniques for Perfectly Layered Cups
To achieve beautifully layered peanut butter cups, it’s crucial to manage the melting of the chocolate carefully. If you’re using a microwave, heat the chocolate in short bursts of 20 seconds and stir in between until it’s completely melted and glossy. This prevents overheating and ensures a smooth texture. If using a double boiler, keep the water simmering, not boiling, to avoid water splashing into the chocolate, which can cause it to seize.
When preparing the cupcake liners, using a muffin tin with a silicone lining can make for easy release. I recommend pouring just enough melted chocolate to cover the bottom, about 1 tablespoon should suffice. This initial layer sets the foundation for your flavors and ensures that the cups hold together well once hardened. Tap the muffin tin gently on your countertop to help the chocolate settle evenly before letting it cool.
Understanding Ingredients for Enhanced Flavor
The choice of dark chocolate is vital; I recommend using chocolate with at least 70% cocoa for a rich, deep flavor that balances the sweetness of the peanut butter filling. If you prefer a sweeter profile, you can mix dark chocolate with a bit of semi-sweet chocolate for a balanced taste. Additionally, the coconut oil not only helps to achieve a smooth melting chocolate but also adds a subtle tropical hint that complements the peanut butter beautifully.
For the peanut butter filling, using creamy peanut butter is essential as it gives that velvety texture that contrasts with the hard chocolate shell. You could experiment with natural peanut butter, just ensure you stir it well as the oil can separate. If you’re looking for a healthier twist, almond or cashew butter can be used, providing a different flavor profile while maintaining creaminess.
Ingredients
Gather the following ingredients to create these irresistible peanut butter cups:
For the Chocolate Layer
- 8 oz dark chocolate (70% cocoa or higher)
- 1 tablespoon coconut oil
For the Peanut Butter Filling
- 1 cup creamy peanut butter
- 1/2 cup powdered sugar
- 1 teaspoon vanilla extract
- Pinch of salt
Once you have everything ready, you're all set to create these amazing treats!
Instructions
Follow these steps carefully to ensure perfect peanut butter cups:
Melt the Chocolate
In a double boiler or microwave, melt the dark chocolate and coconut oil until smooth. Stir until fully combined.
Prepare the Molds
Line a muffin tin with cupcake liners. Pour a small amount of melted chocolate into the bottom of each liner, just enough to cover the base.
Add Peanut Butter Filling
In a bowl, mix the peanut butter, powdered sugar, vanilla extract, and salt until creamy. Spoon a dollop of peanut butter mixture onto the chocolate layer in each liner, spreading it gently.
Top with More Chocolate
Pour the remaining melted chocolate over the peanut butter layer until completely covered. Smooth the top and tap the tin to release air bubbles.
Chill and Serve
Refrigerate the cups for about 15-20 minutes until set. Once firm, remove from liners and enjoy your delicious homemade treats!
Enjoy indulging in your homemade peanut butter cups!
Pro Tips
- Feel free to add a sprinkle of sea salt on top before chilling for an extra flavor twist. You can also experiment with different types of nut butters for a unique take on this classic treat.
Make-Ahead and Storage Tips
These homemade peanut butter cups can be prepared in advance and stored in the refrigerator for up to two weeks. Just ensure they are kept in an airtight container to maintain freshness. You can also make larger batches and freeze them. Place the cups in a single layer on a baking sheet, freeze until solid, then transfer them to a freezer-safe container for up to three months.
If you prefer to have a fresh treat on hand, consider scaling the recipe up. You can double the ingredients and use two muffin tins, which will yield a delightful stash for sharing or indulging during movie nights. Just ensure both the chocolate and peanut butter fillings are evenly divided among the liners for consistent flavor.
Serving Suggestions and Variations
These peanut butter cups can be enjoyed straight from the fridge, but if you’re feeling adventurous, try topping them with crushed nuts or a sprinkle of sea salt before chilling them. This adds an interesting crunch and a burst of flavor that elevates the entire tasting experience. You can even drizzle a white or milk chocolate swirl on top for a beautiful presentation.
If you want to experiment with flavors, consider mixing in a bit of shredded coconut or chopped dried fruit into the peanut butter filling for an unexpected twist. You could also infuse the filling with spices like cinnamon or even a hint of chili powder for a spicy-sweet treat. The possibilities are endless, making these cups a versatile option for your dessert repertoire.
Questions About Recipes
→ Can I use milk chocolate instead of dark chocolate?
Yes, you can use milk chocolate, but it will change the flavor profile and sweetness of the cups.
→ How long can I store these peanut butter cups?
They can be stored in an airtight container in the refrigerator for up to 2 weeks.
→ Can I make these vegan?
Yes, just use dairy-free dark chocolate and ensure your peanut butter is vegan!
→ What if I don’t have coconut oil?
You can substitute coconut oil with another oil, but it’s recommended to use one with a neutral flavor.
Homemade Peanut Butter Cups Dark Chocolate
Created by: Marianne Hughes
Recipe Type: Dessert Bliss
Skill Level: Beginner
Final Quantity: 12 cups
What You'll Need
For the Chocolate Layer
- 8 oz dark chocolate (70% cocoa or higher)
- 1 tablespoon coconut oil
For the Peanut Butter Filling
- 1 cup creamy peanut butter
- 1/2 cup powdered sugar
- 1 teaspoon vanilla extract
- Pinch of salt
How-To Steps
In a double boiler or microwave, melt the dark chocolate and coconut oil until smooth. Stir until fully combined.
Line a muffin tin with cupcake liners. Pour a small amount of melted chocolate into the bottom of each liner, just enough to cover the base.
In a bowl, mix the peanut butter, powdered sugar, vanilla extract, and salt until creamy. Spoon a dollop of peanut butter mixture onto the chocolate layer in each liner, spreading it gently.
Pour the remaining melted chocolate over the peanut butter layer until completely covered. Smooth the top and tap the tin to release air bubbles.
Refrigerate the cups for about 15-20 minutes until set. Once firm, remove from liners and enjoy your delicious homemade treats!
Extra Tips
- Feel free to add a sprinkle of sea salt on top before chilling for an extra flavor twist. You can also experiment with different types of nut butters for a unique take on this classic treat.
Nutritional Breakdown (Per Serving)
- Calories: 380 kcal
- Total Fat: 26g
- Saturated Fat: 15g
- Cholesterol: 195mg
- Sodium: 85mg
- Total Carbohydrates: 32g
- Dietary Fiber: 3g
- Sugars: 24g
- Protein: 6g